Git For Windows Developers – Git Series – Part 2
Git For Windows Developers - Git Series - Part 1
Git For Windows Developers - Git Series - Part 2
Git For Windows Developers - Git Series - Part 3
_UPDATE: I no longer use the “git pull –squash…” workflow. I use git rebase -i aka interactive rebase. There are plenty of docs out there on this so please look into it before reading this post.
Please make sure you’ve read the first post and have created your SSH private and public keys. You should also have a very basic understanding of the git init, add, commit, and log commands. We will dive deeper on each of those. We also visit git checkout, pull (—squash), push, remote, diff, log, mv. I’ve done my best at making each git command that is mentioned in text to be of bold weight. Each image, if a command is involved, has that command in big text before it.
This post is going to go over my typical workflow for work. I’ll get as detailed as I can for this process:
- git pull origin master
- git checkout –b user_prompt
write some code- git add (as necessary)
- git commit –a –m “commit message”
- repeat step 3-5 as many times as necessary
- git checkout master
- git pull –-squash . user_prompt
- git commit –a –m “add name validation and tests”
- git pull origin master
- git push origin master
For this example, we’re going to create a remote public git repository on Github.com. What is Github.com? Github.com is the most popular Git repository hosting website on the Internets (misspelled on purpose) today, in my opinion.
First, I’m going to create my github.com account. I go to http://www.github.com and click the “Pricing and Setup” link:

Next, I click the “Signup” link next to the “Free!” account (Once you get comfortable, upgrading is easy):

Now I need to copy my public ssh key (id_rsa.pub) that I created from the first post into the Windows clipboard, so I can paste it to the web UI on this next step. That means opening Notepad (Windows, type notepad and choose it from the results [Vista/Windows 7] or Start->Programs->Accessories->Notepad [2000/XP]) and choose File->Open and go to my user folder and then the .ssh folder and choose the id_rsa.pub (C:Usersjmeridth.sshid_rsa.pub). I noticed that the default file extension that notepad searched for was text files (.txt). I had to change the drop-down in the bottom right corner to “All Files (.*)” and then I was able to see my files in the .ssh folder. We are using notepad because it won’t put any hidden newlines into the content we are trying to copy and paste to Github.com. We will talk about this later in the post.
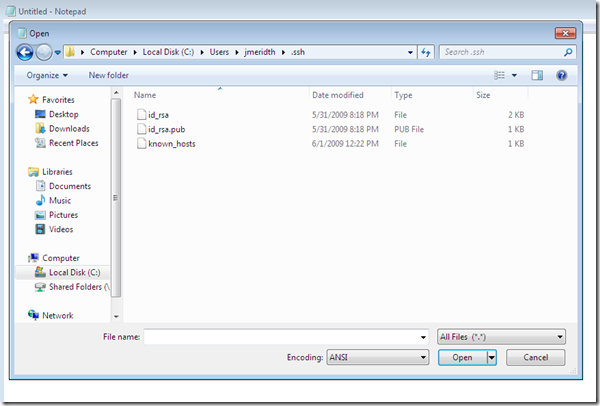
I chose the id_rsa.pub file and it showed in notepad.
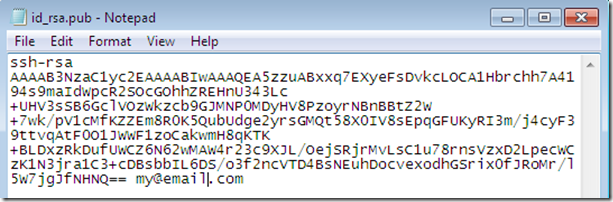
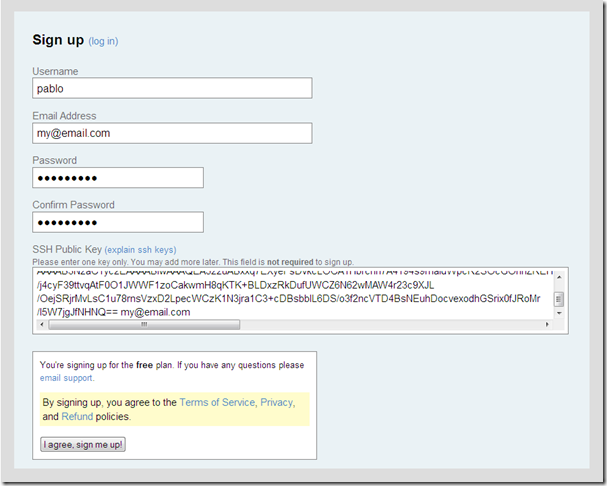
Press ctrl+A and then ctrl+c (or Edit->Select All and Edit->Copy). Go back to the Github signup page and input your information. I paste (ctrl+v) the id_rsa.pub key I saved into the Windows clipboard into the SSH Key box:
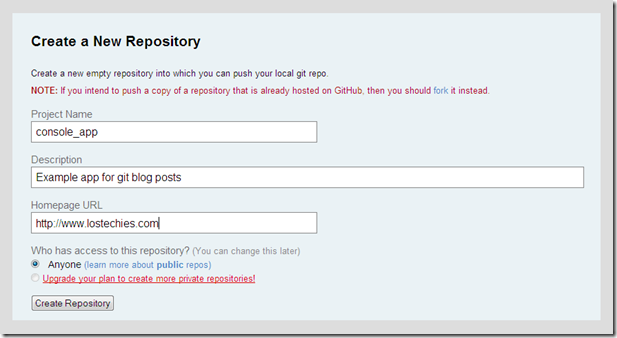
I click “I agree, sign me up!” and I am taken to my dashboard (at least I think so, I’m not actually clicking this since I already have an account). I create the remote public repository for this series on Github.com by clicking the “Create a new one” link on the right side near “Your Repositories”.

I fill in the name, description, and web page for the repository. I’m sticking with the console_app:
I click “Create Repository” and I’m taken to a very informational page:
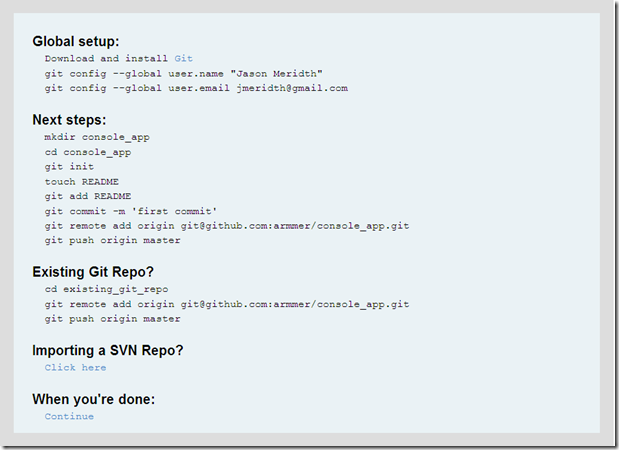
(the user.name and user.email suggestions are different than the examples above due to me creating this repository under my real github.com account).
Above this information is the part I need for this post:

Really, just this part:

I open Git Bash and go to my repository that I created in the last post (/c/code/console_app):

FINALLY, GIT COMMANDS:
GIT BRANCH
SIDE NOTE: You can clear your Git Bash screen by pressing Ctrl+L on the keyboard. This works in most bash terminals.
Normally, I run “git branch” to see what branch I am on, but msysgit let’s me know via the end of my bash prompt “(master)”. I’m going to check anyway:

The branch name with the asterisk (*) next to it is the active branch. In this case I only have the one branch, master. I paid particular attention the the “Existing Git Repo?” section of the informational page on my Github.com console_app information page:

GIT REMOTE
I already di the cd command (cd /c/code/console_app). I then type the “git remote …”:

What the? Okay, the command is “git remote” with the “add”, “origin”, and “git@github.com:armmer/console_app.git” parameters. The “git remote” command with the “add” parameter tells your local git repository that you are adding the path/URL/location of a remote repository that you want to watch. In this case we’re going to label this remote repository “origin” and the location is “git@github.com:armmer/console_app.git”.
SIDE NOTE: git@github.com:armmer/console_app.git doesn’t look like a HTTP URL or a ssh:// protocol. What protocol is that? It is still SSH. The git protocol, usually using port 9418, is used for clone, fetch, or pull (i.e., git://github.com/armmer/console_app.git). Please reference Stefan’s comment below for more details.
Now I have told my local repository to watch my newly created github.com remote public repository.
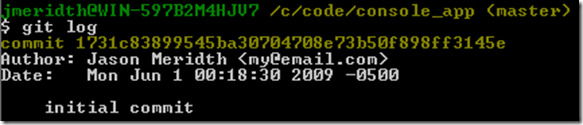
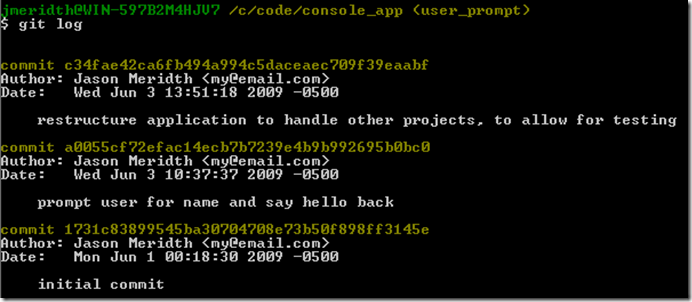
GIT LOG
I run “git log” again to see the changes we made in the first post:
GIT PUSH
Okay, I am going to push this code up to the Github.com repository. Look at the last step of the “Existing Git Repo?” information from Github.com. I type the “git push origin master” command:
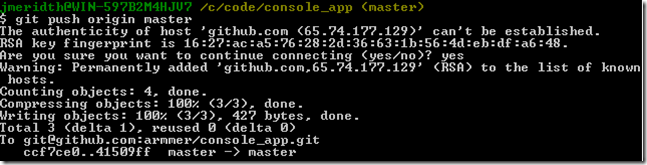
(UPDATE: This screenshot is a newer one and has the incorrect object count. This is to show the prompt for the host authenticity)
UPDATE: During the push, you will most likely get prompted for host authenticity. Make sure you type ‘yes’, the full word. Not just ‘y’. This will add github.com’s public RSA key to your ~/.ssh/known_hosts file so that you won’t get prompted for this again on any future push. This let’s your system know that you trust github.com and let’s github.com know that you trust it. After you say yes the files are pushed up to the remote repository.
Success!! It counted the objects, compressed them and wrote them up to the remote repository. This command translates to “I am pushing my local master branch to the master branch of the remote repository I have labeled origin”. Where does it mention the local master branch in that command? It doesn’t. It’s the convention. If no local branch is mentioned explicitly, the master branch is used.
SIDE NOTE: To push another local branch, I’d type “git push origin user_prompt:master” or “git push origin HEAD:master” if you just want to push the current local branch without having to remember it’s name.
Now we go back to the github.com repository main page and see the code and commit log:
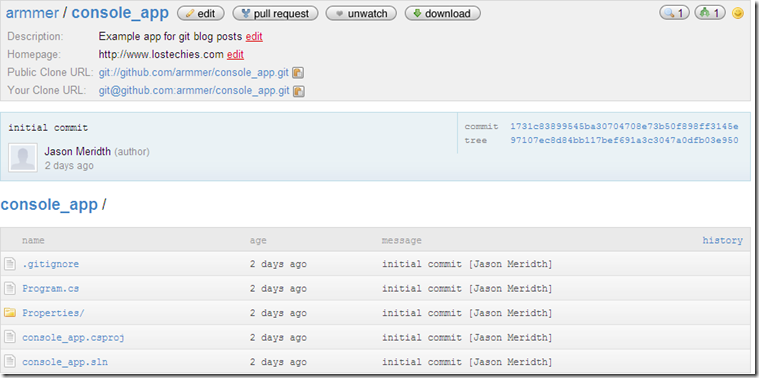
My code is now remote and stored on Github.com. Sweet.
SIDE NOTE: If you get a “permission denied” or other errors, it is most likely ssh key related, hence, my emphasis on them. Check out this link for ideas/help.
GIT CHECKOUT
Now let’s imagine that we have a task that states “Prompt user for their name and say hello back to them, including their name”. I create a new branch locally so I have a separate place to do my active development for this task. I issue the command “git checkout -b user_prompt”.

A couple things to notice:
- It says “Switched to a new branch ‘user_prompt’”. The “git checkout –b” command creates a new branch by the name following the command and then checks it out automatically. This is the shorthand version of doing “git branch user_prompt” and then “git checkout user_prompt”.
GIT BRANCH
- It shows the “(user_prompt)” text at the end of my bash prompt now. That means that I’m on the user_prompt branch. To verify, I issue the “git branch” command. This lists all the local branches.

Again, the name with the asterisk (*) next to it is the active branch.
I make the code change:
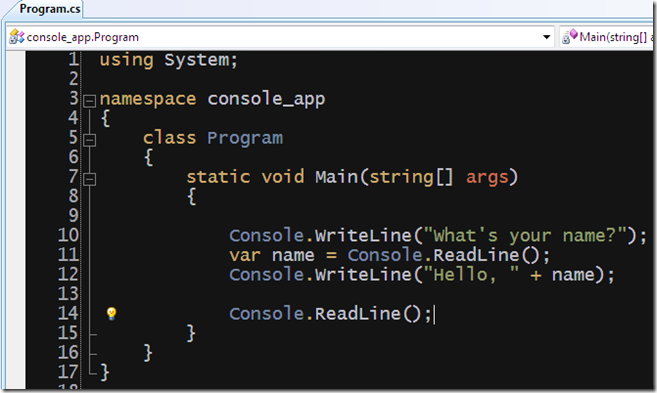
(I have a “Console.ReadLine();” as the last line so the window doesn’t automatically close. I have to press a carriage return to close it. So I can read the output)
In all honesty, I wouldn’t test something like this, because I’d be testing the Framework. I test it manually and it works:

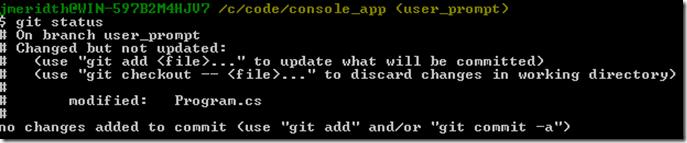
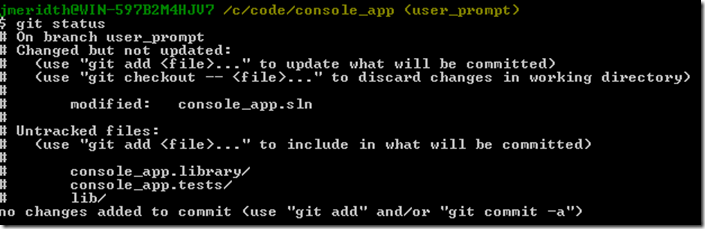
GIT STATUS
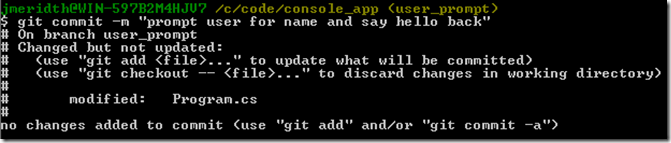
I commit my code to the repository. I run “git status” to see what the status is between the staging area and the working directory:

This tells me because I edited the Program.cs file it is “Changed by not updated”. What does that mean? It means it’s changed in my working directory, but not staged (not in my staging area or ready for commit). If I tried to commit right now, nothing would be committed because nothing is in my staging area.
GIT COMMIT
Example of running “git commit …” without adding files to the staging area:
GIT ADD
I add Program.cs to my staging area with the “git add Program.cs” command:

GIT STATUS
I run “git status” again:
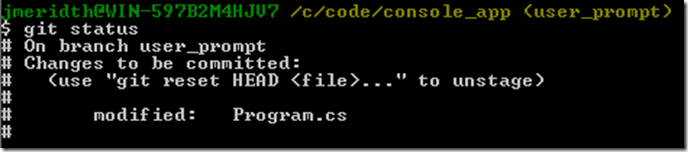
The Program.cs file has been added to the staging area. How do you know that? Well, it is under the “Changes to be committed” section. That is synonymous with the staging area. Why don’t they just put that there: “Staging Area”? Good question. I don’t know.
SIDE NOTE: Notice every time I run “git status” the first thing I’m told is what branch I’m on. It’s nice to be reminded of that
GIT COMMIT
Now I commit it to the local repository with the “git commit –m ‘prompt user for name and say hello back’”:

Nice. Okay, we’re going to roll back, add the code again and commit in the “common” way. Huh? “Common way”? Most people do not do the “git add” and then “git commit –m …”. They, like myself, use the “git commit –a –m …”. The “-a” automatically adds all tracked changes from your working directory to the staging area. This does not include new files that aren’t tracked by the repository.
GIT RESET
I roll back one commit clearing my staging area and working directory with the “git reset –hard HEAD^” command:
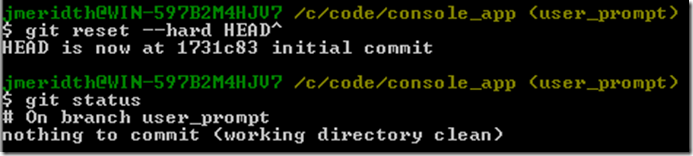
What is the “HEAD^” portion of that command"? It means I want to reset the commits to one prior (^) to the HEAD (aka, the latest commit).
The result is “HEAD is now at 1731c83 initial commit”. That was the commit I did in the last post. This branch has been rolled back to that commit. The new commit I just did was destroyed from history. I will talk about undoing changes in greater detail in a future post. I run “git status” too and see that my working directory is clean.
SIDE NOTE: If you just want to clear your working directory and staging area, but not the latest commit, just issue a “git reset –-hard” command without the “HEAD^”
REFRESHER: What is the 1731c83? It is the first 7 digits of the SHA1 hash, talked about in the first post, that was assigned to my “initial commit”. Seven digits are all you need from the front of the commit to identify it uniquely.
GIT STATUS
I add the code change back and run “git status” again:
GIT COMMIT
Notice git even suggests the “git commit –a” notation? I run “git commit –a –m ‘prompt user for name and say hello back’”:

Same result as the “git add…” “git commit –m…”, just shorter syntax. Moving on.
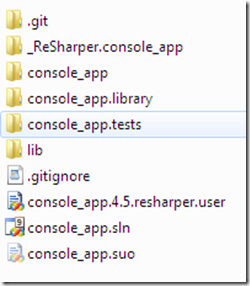
Low and behold, the user then comes by and states, “Oh yeah, the name can’t have any numbers in it.” That’ means I need to add more code. I could merge back to the master branch and push to my origin on Github.com and put this up as another task for the Story. For the sake of this post, I’m going to add the code here before the merge. Validation and specific business behavior makes me prepare for testing. I do my usual setup (lib folder with NUnit and break the main portion of the console app out to a class library and it’s test project). Uh oh, I realized I said “No” to the prompt to create a whole other folder for the projects. I have the solution file and the console_app project in the same folder.
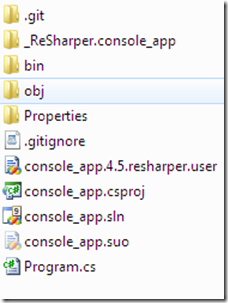
So I move the project files and folders into their own folder and leave the console_app.sln file (and related files) in the current directory. I then change the project references inside the sln file, so that it can still reference the console_app project. Why don’t you just move the sln (and related files) up a directory? Unfortunately, the .git folder is at this level. If I move anything above this folder, it will be outside the local git repository. All folder and file moves need to be from this folder and down.
GIT MV
I make the moves with the “git mv” command:

(yes, to all of the current tortoisegit users, I believe if you select multiple files in windows explorer and move the files, it will do this for you)
So “git mv” takes a list of files, directories, or symlinks (for the *nix users) and will move them to the destination directory listed as the last option. This will do “git rename” to all the files and you won’t lose any history. (I chose “No” to the solution/project folder question at the beginning on purpose to show the “git mv” command here. Sure Jason, sure.)
GIT HELP
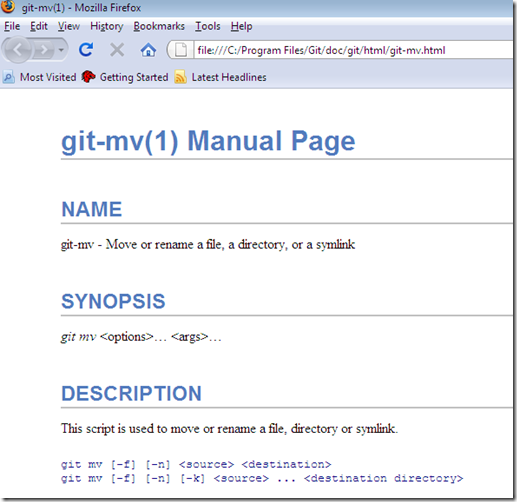
Site Note: I forgot the arguments for “git mv” and therefore typed “git help mv” into the Bash GUI:

Unlike on a *nix system, where you’ll just get the man page in the console, msysgit will open the web-based git help in your default browser:
I forgot, “git mv” even has a “—dry-run” option that will just show you if the move would succeed without errors. Did I mention how much I like git? :)
After the physical structure change, I manually test the console_app again and it still works:

GIT STATUS
I am going to commit these changes, so I have a stable place to come back to, just in case (Check-in early and often, right?). I first issue a “git status” to see what is in the staging area and what’s still in my working directory un-staged:
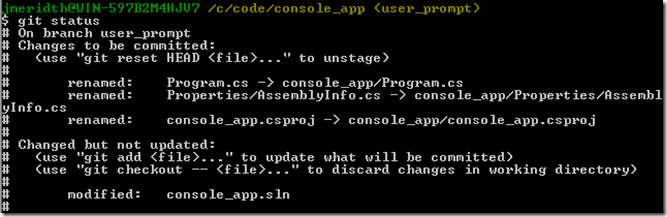
So, because we used “git mv” for the Program.cs, Properties folder, and the console_app.csproj file and they were already being tracked by the repository, they are in the staging area. We had to edit the console_app.sln file to point to the new console_app subfolder. The reason the renames are already in the staging area is because we did not edit their content, just moved them (a git, aka non-human, process).
GIT COMMIT
I commit the code with “git commit –a –m ‘restructure application to handle other projects, to allow for testing’”:

GIT LOG
We should now have three commits in our log, “git log”:
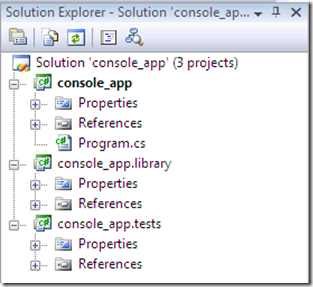
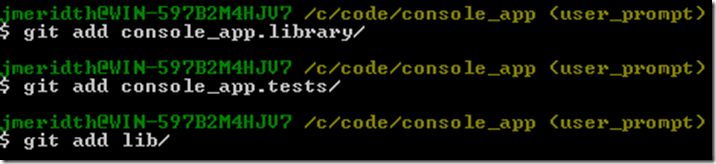
Now I add my two other projects (library and test) and the lib folder (containing NUnit):
GIT STATUS
I then run “git status”:
GIT ADD
Now I run “git add…” for each of the newly untracked items. If I committed right now, those items would not be put into the repository:
GIT COMMIT
I run “git commit –a –m ‘add library and tests projects to solution’”:
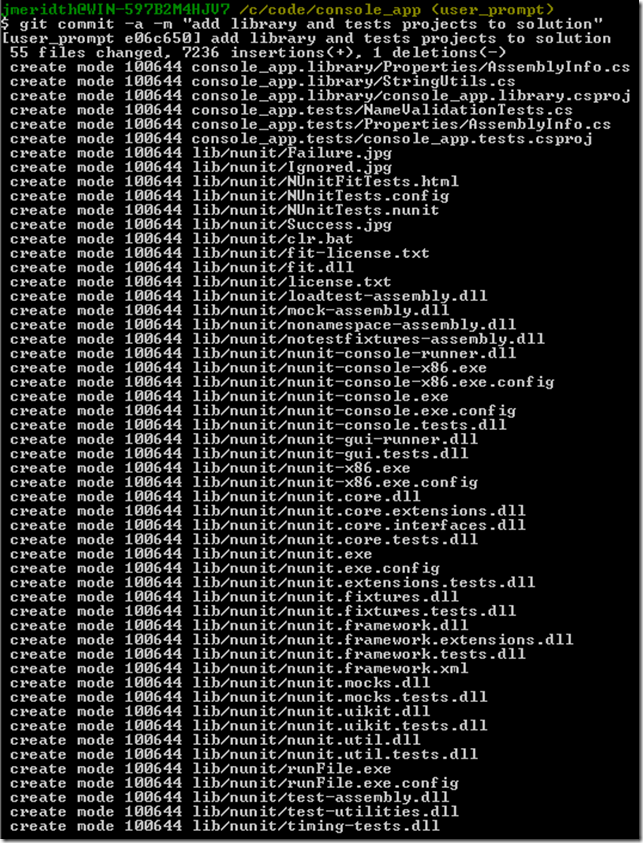
This is a decently sized commit due to the inclusion of lib/nunit.
SIDE NOTE: I love the ability to commit to my local repository knowing how I’m going to be able to merge to my local master branch as one commit and then push it up to the remote repository (coming soon). Via my lessons learned, as a software developer I sometimes have the tendency to go on a tangent and forget my training as a TDD Padawan. I make too many changes and break a lot more stuff than expected. Ctrl+Z (undo) works most of the time, but to just issue a “git reset –hard” and have my current branch reset back to the latest commit, clearing the working directory and staging area is priceless (as mentioned earlier).
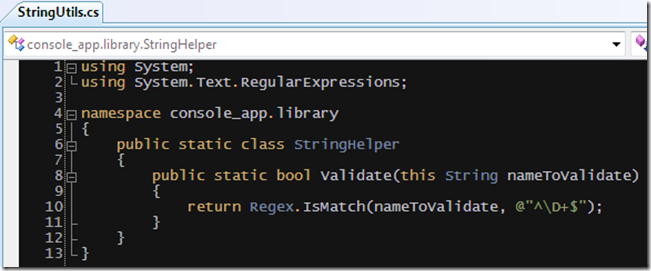
I now write the tests and code for the name validation and run the tests:
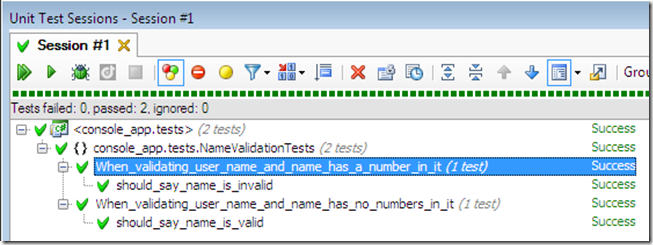
Here are the tests:
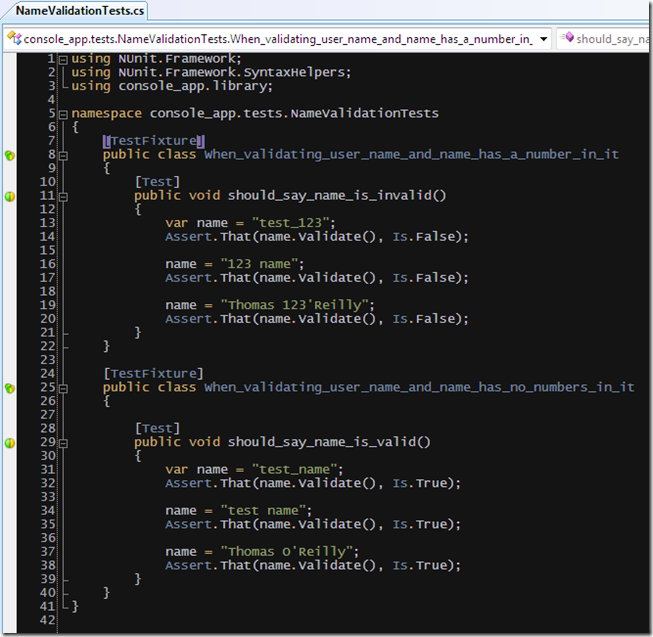
and code:
GIT STATUS, GIT ADD, GIT COMMIT
I run “git status” to see the changes, and run “git add console_app.library/InvalidNameFormatException.cs”, and “git commit –a –m ‘add name validation with tests’”:
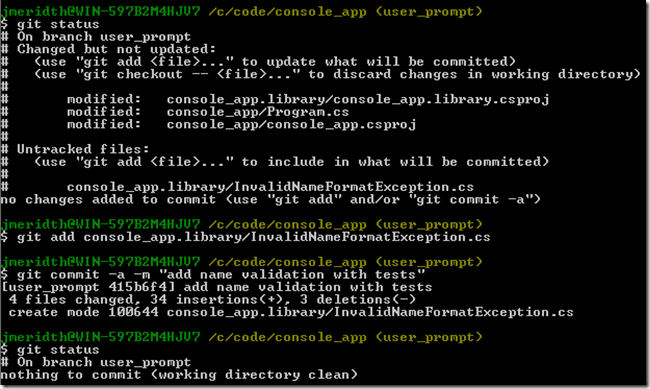
GIT STATUS
I run “git status” one more time verifying all the content is in my local repository.
Now comes the fun part of merging the changes back to the master branch so that we can push to the remote repository (is there an echo in here? hehe). There are at least three different ways to do this. I’m going to cover how I do it and will mention the others in future posts.
GIT CHECKOUT
I type “git checkout master” to switch back to the master branch:
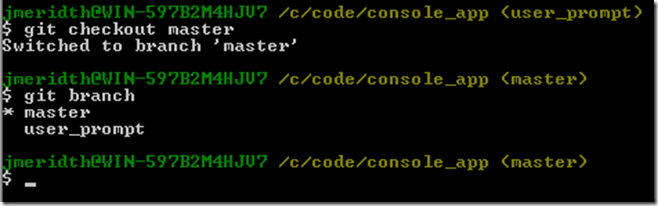
GIT BRANCH
I issue the “git branch” command again to see that it switched. Again, you don’t have to do that because msysgit shows you the current branch you are in in the command prompt (promise, last time I’ll say it. Repetition works though. :) ).
GIT REMOTE
I type “git remote –v” to look at the remote repositories that I’m watching:

We are monitoring the “git@github.com:armmer/console_app.git” repository and have named it “origin”.
GIT PULL
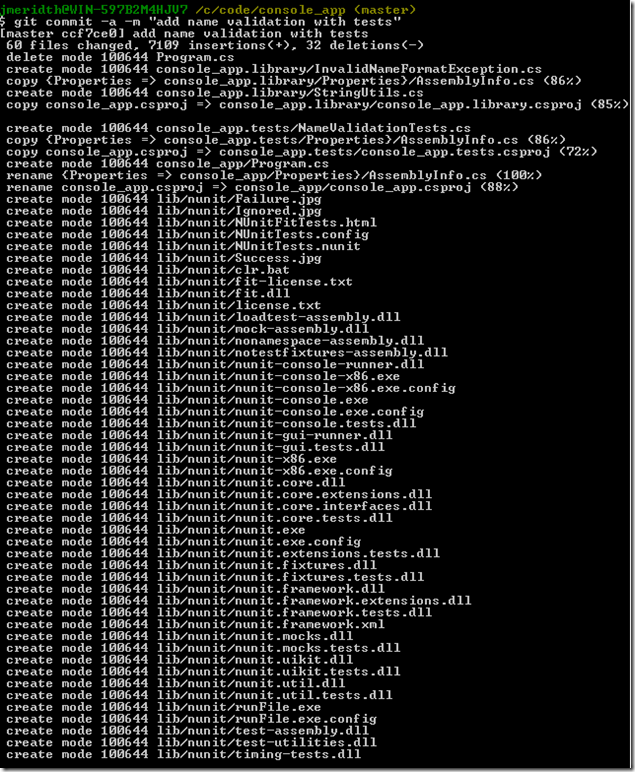
I type “git pull –-squash . user_prompt”:
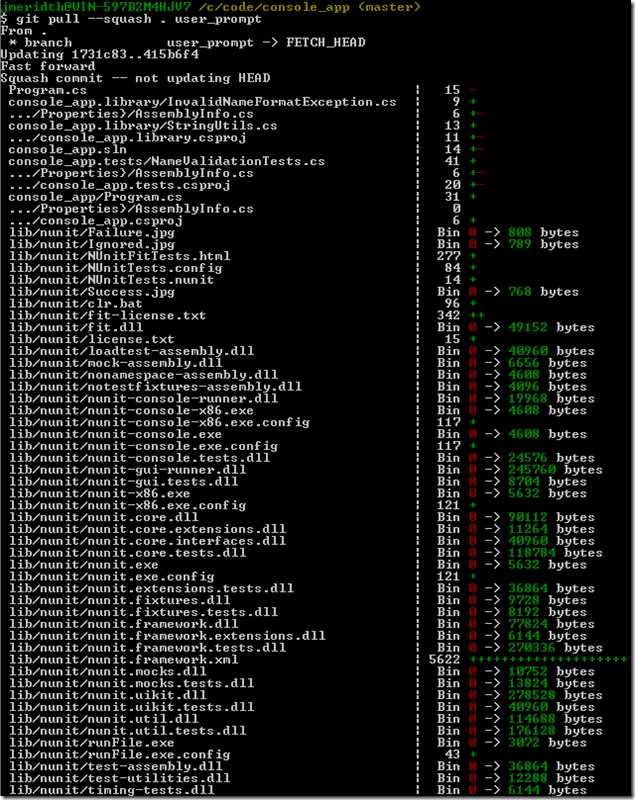
GIT STATUS
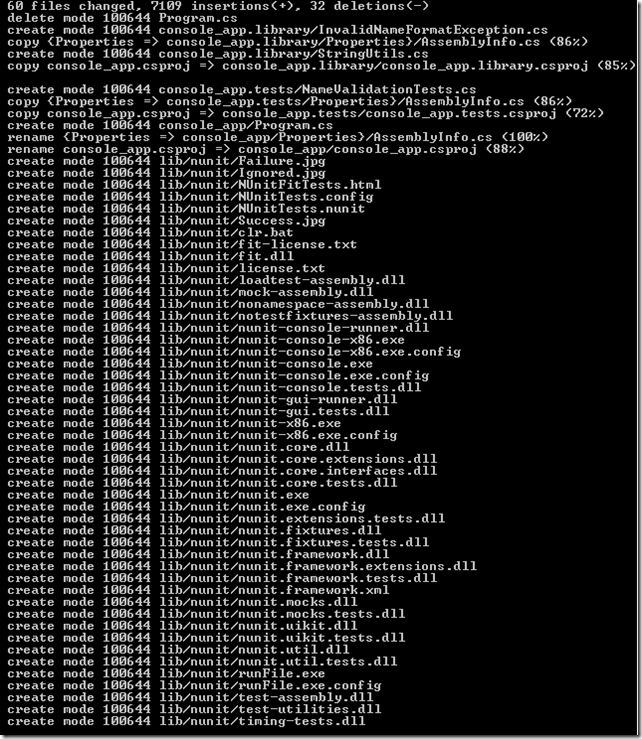
Whoa, that’s a lot of information. I type “git status” before I do the single (aka squashed) commit to the master branch:
… more new file references for nunit are below this. As you can see, everything that we committed in the user_prompt branch is staged in the master branch now (aka “Changes to be committed”).
GIT COMMIT
I type “git commit –a –m ‘add name validation with tests’”:
Everything is now committed on the master branch.
GIT STATUS
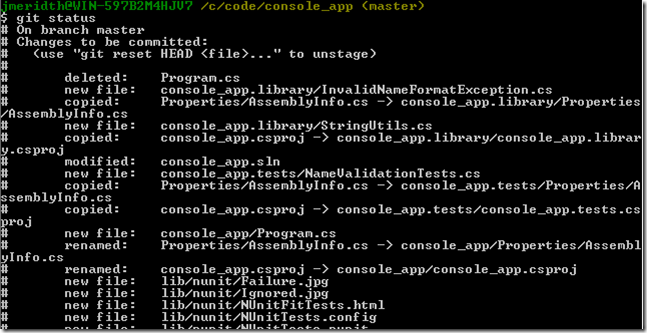
As usual, by now you know, I run “git status”:

GIT LOG
I type “git log” on master and I only see two commits:
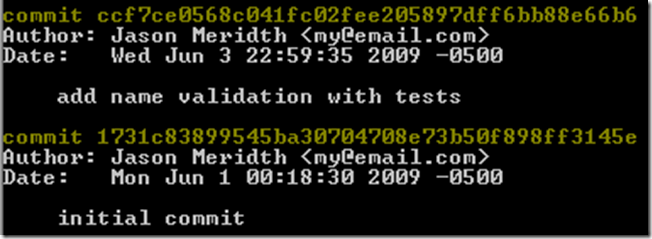
That was the point of the squash. So you can do n number of commits in your “development” branch (in this case user_prompt) and turn it into one commit on master and then push only one commit to your remote repository. That is the power of a distributed source control. Local commits are priceless.
GIT PUSH
I finally type “git push origin master”:
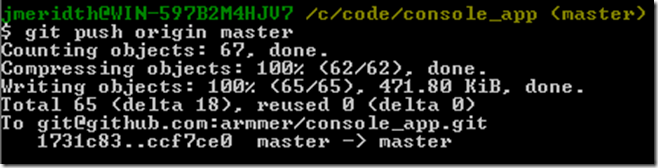
This is the same as the original command we used to push our original commit to the Github.com repository. The command was explained above when we did it the first time.
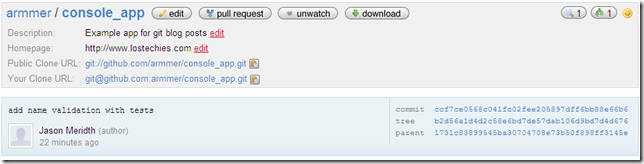
And when I go to my github.com page I see the latest commit on the dashboard of the repository (same as the source tab):
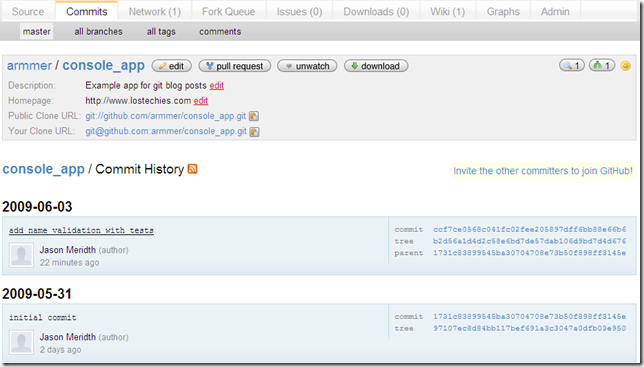
When I click on the Commits tab, I see both commits, just like when I run “git log”:
GIT BRANCH
The last set of commands I issue are “git branch –D user_prompt”:

and “git branch” to make sure it is gone.

Phew! I know this is a ton of images and information. There are other blogs and tutorials on git that show the commands and that it works, but I’ve been wanting to do a more visual blog entry and also give the side notes and insights I’ve learned.
The next post will be on the .git folder and it’s magic.
Thanks for reading.
Source Code for this post can be found here